custom domain for github pages
There are far more problems in the world than setting up a custom domain. it’s ridiculous how a simple thing is made so complicated that any new user would break their head trying to make it work.
in this blog, i will share how to set up a custom domain using github pages.

i already had github pages1 set up, and i bought a domain from hostinger. if you haven’t purchased a domain, you can get it here, and if you are lazy to create a static page on your own, you can use one of these templates.
Step 1
Deploying your page to github.
- if you need help, you can refer the docs. it’s pretty straight-forward.
Step 2
Sign in to your domain.
- Go to your domain’s home page. for hostinger domains go to: hpanel
- Under domains, choose the domain you want to set the custom domain to by clicking on “Manage”
- On the left panel, click on “DNS/Nameservers” to configure the CNAME and A records.
Step 3
Now this is the tricky part where most of the misconfiguration happens.
- If you find any existing “CNAME” records or “A records”, delete them
Step 4
Adding CNAME and A records
-
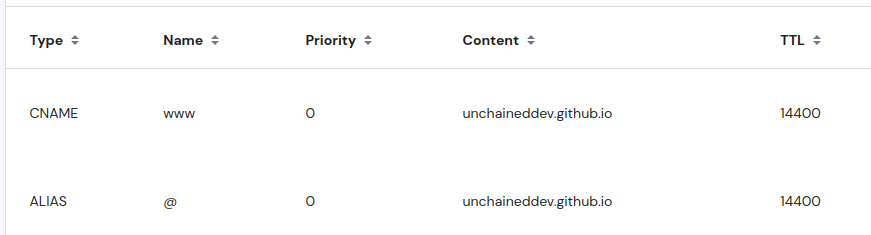
CNAME – There must be 2 CNAME records, and both records must point to ‘your-github-username.github.io’
- First CNAME record must have ‘www’
- Second CNAME record must be left blank
After saving both CNAME records, the result should look like this.
- A Records – There are 4 github IPs we need to add to our A records, and they are as follows:
185.199.109.153
185.199.110.153
185.199.111.153
After saving all the A records, the result should look like this.

Step 5
Add the custom domain to your github.io page.
- Head to your GitHub repository and click on the Settings tab.
- Then, click on the Pages tab and enter your custom domain in the Custom Domain field –> Hit Save
- Wait for 15 mins for the TLS cert to be generated.
And just like that, you have set up your custom domain to GitHub Pages!